I saw this design in a magazine and it really caught my eye:
I love the way it looks like a beautiful, intricate bindhi design, so sparkly, feminine, and elegant. It also didn't look too hard (no time-consuming florals!) so I thought I'd try it out.
Here are the polishes I used:
Top row L to R: Milani Blue Flash, Color Club Take Me To Your Chateau, OPI Last Friday Night
Bottom row: no-name fuchsia glitter polish from Transdesign, Essie Splash of Grenadine, OPI Teenage Dream
First step was to paint little crescents with the glitter polishes, then shape them while the polish is still wet. I used a popsicle stick but an orange stick would be ideal.
Next, I painted French tips with the cream colors. I did this freehand but you can always use sticker guides of course.
Then, I added the sheer glitter toppers. As you can see the tips got a bit smeared so I would advise that you kind of pat the glitter on the tips rather than paint them on. This will minimize the smearing.
Last step was to add the pearls and rhinestones and a thick layer of topcoat:
After I had finished I realized I should have used a slightly darker blue but I still love the results! Rhinestone designs are a fairly easy way to make seemingly ornate designs without much effort. If you're not sure what you want I recommend buying one of the multi-sets on ebay for cheap. Born Pretty Store also has a whole kit you can buy with various rhinestones, orange sticks, dotting tools, and nail glue (link is my referral link).
If you're looking for nail art that is fairly easy but impressive, try this one!
Showing posts with label Color Club. Show all posts
Thursday, June 16, 2011
Tuesday, June 14, 2011
Marble Confetti Mani
I've always thought that water marble manis looked cool but I had no idea how difficult it was! I had to experiment with a few different polishes before I got it right and also messed up a few nails before I got some decent patterns (decent, not great!).
I started with a white base, MAC Vestral White:
These are the colors I used:
L to R: Diamond Cosmetics Orange Blush, Color Club Almost Famous, Nfu-oh 553, American Apparel Office, Color Club Take Me To Your Chateau
Here is the first nail:
I couldn't find tape so I had to clean up all the polish from my skin later (didn't want to use Vaseline or something oily b/c it might leave a film in the water, preventing the drops of polish from spreading correctly).
Afterward, I added some heart-shaped glitter and colorful rhinestones. Here's the finished product:
It's not quite what I hoped for but I still think it looks fun, like birthday party decorations!
For more detailed instructions on water marbling (and better designs) check out this blog:
http://mysimplelittlepleasures.blogspot.com/
She's so pro! Hopefully I'll be just as good some day!
I started with a white base, MAC Vestral White:
These are the colors I used:
L to R: Diamond Cosmetics Orange Blush, Color Club Almost Famous, Nfu-oh 553, American Apparel Office, Color Club Take Me To Your Chateau
Here is the first nail:
I couldn't find tape so I had to clean up all the polish from my skin later (didn't want to use Vaseline or something oily b/c it might leave a film in the water, preventing the drops of polish from spreading correctly).
Afterward, I added some heart-shaped glitter and colorful rhinestones. Here's the finished product:
It's not quite what I hoped for but I still think it looks fun, like birthday party decorations!
For more detailed instructions on water marbling (and better designs) check out this blog:
http://mysimplelittlepleasures.blogspot.com/
She's so pro! Hopefully I'll be just as good some day!
Labels:
American Apparel,
blue,
Color Club,
Diamond Cosmetics,
green,
MAC,
marble,
nail art,
Nfu-oh,
orange,
purple,
Yellow
Tuesday, April 19, 2011
Black/Blue Mani
I did this one a while back but I wasn't very happy with it. Besides the fact that the overall look is kind of sloppy and random, the black acrylic powder I used to make the bow smeared everywhere. I had to paint over some parts with the nail polish again, making it look really messy.

The base is Color Club Take Me To Your Chateau. I did the bow on my pointer using acrylic powder and the one on my ring finger is just hex glitter pieces and a black rhinestone in the center. The lace parts are stickers.
Definitely not my best work but oh well, you learn from experience.
The base is Color Club Take Me To Your Chateau. I did the bow on my pointer using acrylic powder and the one on my ring finger is just hex glitter pieces and a black rhinestone in the center. The lace parts are stickers.
Definitely not my best work but oh well, you learn from experience.
Labels:
3D acrylic,
blue,
Color Club,
glitter,
lace,
nail art
Monday, March 21, 2011
Color Club Volt of Light
I haven't seen many swatches for the Zoya Mod Mattes, so I was a bit hesitant to buy them. I love the idea of matte brights, though, so I thought I'd do a little experimenting with a matte top coat.


This is Color Club Volt of Light with Essie Matte About You on top. VoL is a neon yellow with green flash. I've read other reviews that said the formula on this was great, but I am wearing five or six coats and there's still some visible nail line. I still love the color, though, bright highlighter yellow. The green shimmer gives it a bit more depth but I think it looks a bit shinier than intended under Matte About You.
It's rainy and cloudy out so the neon yellow feels a bit out of place, but I love my neons!
This is Color Club Volt of Light with Essie Matte About You on top. VoL is a neon yellow with green flash. I've read other reviews that said the formula on this was great, but I am wearing five or six coats and there's still some visible nail line. I still love the color, though, bright highlighter yellow. The green shimmer gives it a bit more depth but I think it looks a bit shinier than intended under Matte About You.
It's rainy and cloudy out so the neon yellow feels a bit out of place, but I love my neons!
Labels:
Color Club,
Essie,
matte,
neon,
Yellow
Monday, March 14, 2011
St. Patrick's Day Mani
I actually forgot that St. Patrick's Day was coming up, I just wanted to wear a green polish. Once I pulled the polish out, though, it occurred to me that I could finally try an idea that I'd been wanting to do for some time.


My first 3D acrylic sculpture! This was inspired by one of Asami's pictures. Mine didn't come out quite as perfect, but I'm proud of it anyway (my right hand did not fare as well...). I know the heart is kind of random, haha. I just really wanted to do a heart! I originally had this over just green polish, but it looked so plain and the color of the shamrock was too close to the color of the polish:

I added a little glitter to make the shamrock stand out more and to make it more interesting overall.
The green polish is Diamond Cosmetics Froggy, a bright grass green. This is actually a neon. I was so excited about this, but ended up being kind of annoyed with it. I think the color is nice, but it's really sheer! In the last picture you can see that after four coats there was still visible nail line, and it took a pretty long time to dry. I added one very thin coat of Color Club Under The Mistletoe and it made it all better! Helps to hide VNL. It's one of my favorite glitters out of the many that I own! The glitter is actually made of small gold flakes so it covers well and isn't gritty (full review here). Next time I wear Froggy I am definitely using something opaque underneath it.
My first 3D acrylic sculpture! This was inspired by one of Asami's pictures. Mine didn't come out quite as perfect, but I'm proud of it anyway (my right hand did not fare as well...). I know the heart is kind of random, haha. I just really wanted to do a heart! I originally had this over just green polish, but it looked so plain and the color of the shamrock was too close to the color of the polish:
I added a little glitter to make the shamrock stand out more and to make it more interesting overall.
The green polish is Diamond Cosmetics Froggy, a bright grass green. This is actually a neon. I was so excited about this, but ended up being kind of annoyed with it. I think the color is nice, but it's really sheer! In the last picture you can see that after four coats there was still visible nail line, and it took a pretty long time to dry. I added one very thin coat of Color Club Under The Mistletoe and it made it all better! Helps to hide VNL. It's one of my favorite glitters out of the many that I own! The glitter is actually made of small gold flakes so it covers well and isn't gritty (full review here). Next time I wear Froggy I am definitely using something opaque underneath it.
Labels:
3D acrylic,
Color Club,
Diamond Cosmetics,
glitter,
green,
nail art,
neon
Thursday, February 24, 2011
Floral Print w/ Lavender Tips
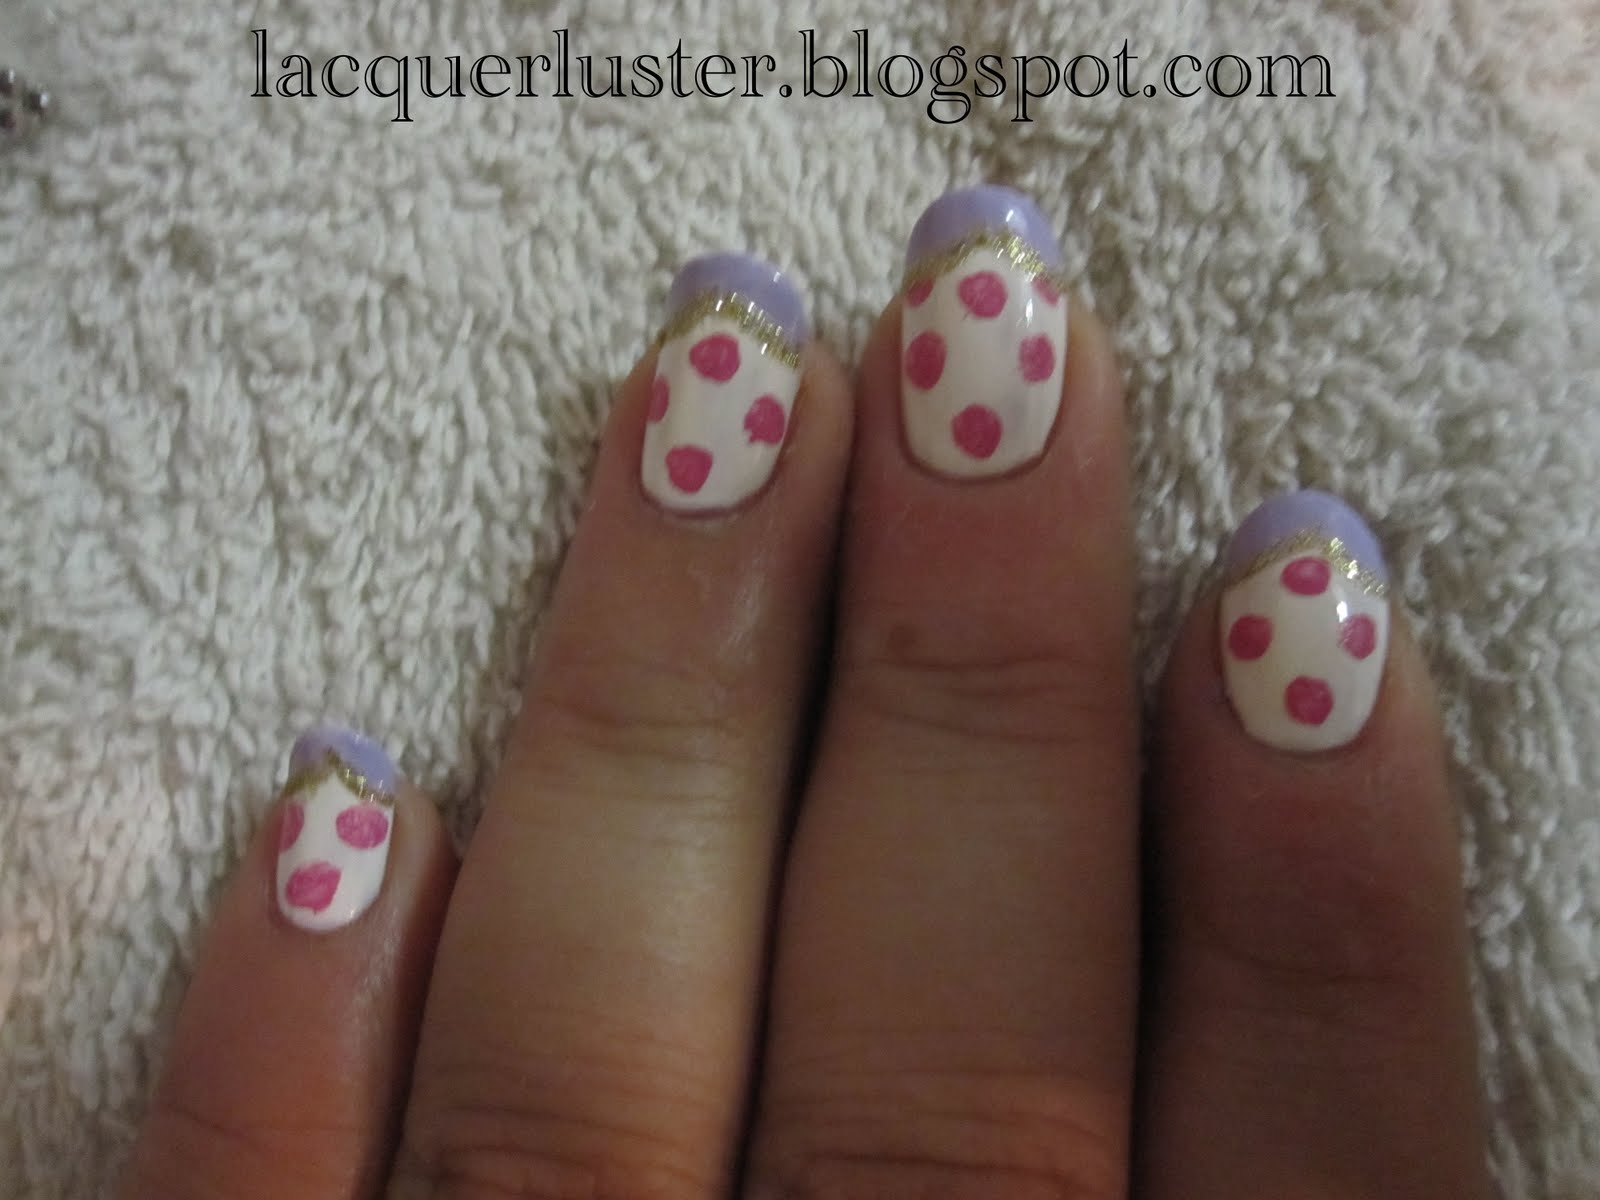
This design was inspired by a post in one of my favorite nail blogs, Cynful Nails. I've wanted to do it since I first saw it, but I wanted to grow my nails out a bit and file them into an oval shape. Isn't it cute? Mine didn't turn out quite as well, but I still love it. I think it might look better on longer nails.

Here are the materials:

Nail polish remover, a small piece of foil, some toothpicks (not pictured), rhinestones, cotton pads, nail art brushes (one with short bristles, another with longer bristles for striping), acrylic paint (I used magenta, white, and green), top coat, base coat, and the following polishes: MAC Vestral White, Diamond Cosmetics Like Satin, Essie Lilacism, and Color Club Sultry Diva.
The first step is to paint the base. I used four coats of Vestral White plus Like Satin to give it an ivory tone. I think this makes it look a bit more vintage. Like Satin is really sheer so I thought it would be easier to layer it on top of a white, but you can just use an off-white polish if you have one, of course.
Next, I used the striping brush to paint curves at the tips with Lilacism, then used the bottle brush to fill them in:

The next step is to squeeze out a little magenta paint and add some dots (for the flowers):

This is much more paint that is needed, you really only need a small drop. I used the short-bristled nail art brush for the circles:

For the gold glitter line, I added a generous drop of Sultry Diva to a small piece of foil:

Dropping the polish onto the foil lets it dry a bit so that the glitter can get a bit more concentrated and you don't need as many coats. Add more as needed (I think I needed three or four drops total), and paint over the curves you made with the lavender polish, using the striper brush again:

For the second color on the flowers, I mixed in some white paint with the leftover magenta (I used a toothpick, as you can see):


Using the short-bristled nail art brush, just dab at the dots you made earlier, painting on tiny dots and lines (this might be better to do with a toothpick):

For the leaves, I mixed the green paint with some white:

I used a toothpick to paint them on:

The final step is to glue on some rhinestones, then top it all off with top coat!


Ta-da! It was quite a bit of work, but I love it! So feminine and perfect for spring! This was my first time using acrylic paint for nail art, but I definitely prefer it over using nail polish. The paint is more pigmented and easier to work with so you can do more detailed work with a smaller amount. It also dries much more quickly than nail polish (or perhaps it's because you don't need to use as much). I'm excited to try more nail art!
I think I might do this mani again for my birthday next month; since it will be my second time I hope it will turn out even better!
Here are the materials:
Nail polish remover, a small piece of foil, some toothpicks (not pictured), rhinestones, cotton pads, nail art brushes (one with short bristles, another with longer bristles for striping), acrylic paint (I used magenta, white, and green), top coat, base coat, and the following polishes: MAC Vestral White, Diamond Cosmetics Like Satin, Essie Lilacism, and Color Club Sultry Diva.
The first step is to paint the base. I used four coats of Vestral White plus Like Satin to give it an ivory tone. I think this makes it look a bit more vintage. Like Satin is really sheer so I thought it would be easier to layer it on top of a white, but you can just use an off-white polish if you have one, of course.
Next, I used the striping brush to paint curves at the tips with Lilacism, then used the bottle brush to fill them in:
The next step is to squeeze out a little magenta paint and add some dots (for the flowers):
This is much more paint that is needed, you really only need a small drop. I used the short-bristled nail art brush for the circles:
For the gold glitter line, I added a generous drop of Sultry Diva to a small piece of foil:
Dropping the polish onto the foil lets it dry a bit so that the glitter can get a bit more concentrated and you don't need as many coats. Add more as needed (I think I needed three or four drops total), and paint over the curves you made with the lavender polish, using the striper brush again:
For the second color on the flowers, I mixed in some white paint with the leftover magenta (I used a toothpick, as you can see):
Using the short-bristled nail art brush, just dab at the dots you made earlier, painting on tiny dots and lines (this might be better to do with a toothpick):
For the leaves, I mixed the green paint with some white:
I used a toothpick to paint them on:
The final step is to glue on some rhinestones, then top it all off with top coat!
Ta-da! It was quite a bit of work, but I love it! So feminine and perfect for spring! This was my first time using acrylic paint for nail art, but I definitely prefer it over using nail polish. The paint is more pigmented and easier to work with so you can do more detailed work with a smaller amount. It also dries much more quickly than nail polish (or perhaps it's because you don't need to use as much). I'm excited to try more nail art!
I think I might do this mani again for my birthday next month; since it will be my second time I hope it will turn out even better!
Monday, February 14, 2011
Color Club Spring 2011: Starry Temptress and Wicked Sweet
I don't think I've seen previews for this anywhere but I got the pictures and info from the Color Club website.
Starry Temptress


"Color Club lets you SPARKLE with STARRY TEMPTRESS, an OTHERWORLDLY collection of STAR-MAKING SHADES that brings
BOLD COLOR and GLITTER DETAIL together. Brush on our “STARRY TEMPTRESS” TOPCOAT for MEGA-SHINE and extra TWINKLE!"
Wicked Sweet


"Color Club serves up Wicked Sweet, a LUSCIOUS collection of VIBRANT COLOR. Once DRY, these fun, DELICIOUS SHADES Become FRUIT SCENTED and totally irresistible!"
NEONS! I looove neons, and now glitter neons and scented neons?? Sooo excited for this! They are already available at 8ty8beauty.com, but I am hoping I will be able to find them at my local Ross soon! Who knows, though, I might just end up taking the plunge anyway!
Starry Temptress


"Color Club lets you SPARKLE with STARRY TEMPTRESS, an OTHERWORLDLY collection of STAR-MAKING SHADES that brings
BOLD COLOR and GLITTER DETAIL together. Brush on our “STARRY TEMPTRESS” TOPCOAT for MEGA-SHINE and extra TWINKLE!"
Wicked Sweet


"Color Club serves up Wicked Sweet, a LUSCIOUS collection of VIBRANT COLOR. Once DRY, these fun, DELICIOUS SHADES Become FRUIT SCENTED and totally irresistible!"
NEONS! I looove neons, and now glitter neons and scented neons?? Sooo excited for this! They are already available at 8ty8beauty.com, but I am hoping I will be able to find them at my local Ross soon! Who knows, though, I might just end up taking the plunge anyway!
Labels:
Color Club,
glitter,
neon,
scented
Wednesday, January 12, 2011
Color Club Spring 2011, Alter Ego
I just saw this on Scrangie but had to repost.

Alter Ego!
Color Club lets you create high-fashion looks for every identity with Alter Ego, their latest collection of diverse, long-lasting lacquers!
Alter Ego’s consists of 12 shades! Go incognito with our opaque shades or rendezvous in full view with our sheers of Alter Ego ‘LIGHTS’ and ‘DARKS’!
Alter Ego’s ‘Reveal Your Mystery Collection’ 7 piece salon pack includes Get a Clue, Revealed, Incognito, Secret Rendezvous, Sheer Disguise, and Give Me a Hint shades plus Milky White Base Coat. Their ‘Keep It Undercover Collection’ 7 piece salon pack includes Alter Ego, Secret Agent, Total Mystery, Alias, Ulterior Motive and Masquerading plus Vivid Top Coat.

Get a Clue, Revealed, Incognito, Secret Rendezvous, Sheer Disguise, and Give Me a Hint shades plus Milky White Base Coat

Alter Ego, Secret Agent, Total Mystery, Alias, Ulterior Motive and Masquerading plus Vivid Top Coat.
I loooove Color Club (in case you hadn't noticed). They have a huge range of unique colors, the price is reasonable, and the formula is usually good. It could be my favorite nail polish brand. It looks like this collection has a lot of duochromes, I'm so excited! Kind of blah about the pastel ones, though.

Alter Ego!
Color Club lets you create high-fashion looks for every identity with Alter Ego, their latest collection of diverse, long-lasting lacquers!
Alter Ego’s consists of 12 shades! Go incognito with our opaque shades or rendezvous in full view with our sheers of Alter Ego ‘LIGHTS’ and ‘DARKS’!
Alter Ego’s ‘Reveal Your Mystery Collection’ 7 piece salon pack includes Get a Clue, Revealed, Incognito, Secret Rendezvous, Sheer Disguise, and Give Me a Hint shades plus Milky White Base Coat. Their ‘Keep It Undercover Collection’ 7 piece salon pack includes Alter Ego, Secret Agent, Total Mystery, Alias, Ulterior Motive and Masquerading plus Vivid Top Coat.

Get a Clue, Revealed, Incognito, Secret Rendezvous, Sheer Disguise, and Give Me a Hint shades plus Milky White Base Coat

Alter Ego, Secret Agent, Total Mystery, Alias, Ulterior Motive and Masquerading plus Vivid Top Coat.
I loooove Color Club (in case you hadn't noticed). They have a huge range of unique colors, the price is reasonable, and the formula is usually good. It could be my favorite nail polish brand. It looks like this collection has a lot of duochromes, I'm so excited! Kind of blah about the pastel ones, though.
Labels:
Color Club
Tuesday, December 14, 2010
Color Club Object of Envy
I wanted to do something festive, so I went with a green glitter.
This color is super pretty, but I have been so spoiled by the Milani Rockstar glitters. This is five coats! Still, it's a lovely kelly green glitter and it's not as gritty as a lot of glitter polishes (Color Club seems to have smoother glitter somehow). Besides the fact that it requires so many coats, application was just okay. A bit thin, and took a bit long to dry (compared to most glitters).
Gotta get in all the holiday manis I can before they're over!
Labels:
Color Club,
glitter,
green
Thursday, December 2, 2010
Color Club Red Velvet
I felt like doing a vampy color, and this did not disappoint!

It's a black base with lots of red glitter. I know this color is not unique, but I've never tried one like it before so it's new to me! Very goth, mysterious, and glow-y. Plus, the name is so sexy and fun! The formula was good, it actually reminds me of Rescue Beauty Lounge polishes--applies almost like a matte polish, first coat is streaky, average-to-slightly-quicker drying time. With careful application you can definitely get away with two coats, but I used three. I think I will have to remember this one for Halloween next year!
I also wanted to do a quick preview of the Hard Candy matte top coat:

Left to right: with Seche Vite, without top coat, with HC matte top coat
As you can see, it's a bit more matte than a satin/leathery finish, but not quite as matte as some true matte polishes. I will have to do a more extensive review another time. On another note, look at the effect that Seche Vite (or any top coat) has! Besides adding a glossy finish, it really gives depth to the color.
Color Club can be found at some Bed Bath and Beyond locations, as well as several websites. This one was part of a (very cheap!) set I found at Ross, though, so go take a look!
It's a black base with lots of red glitter. I know this color is not unique, but I've never tried one like it before so it's new to me! Very goth, mysterious, and glow-y. Plus, the name is so sexy and fun! The formula was good, it actually reminds me of Rescue Beauty Lounge polishes--applies almost like a matte polish, first coat is streaky, average-to-slightly-quicker drying time. With careful application you can definitely get away with two coats, but I used three. I think I will have to remember this one for Halloween next year!
I also wanted to do a quick preview of the Hard Candy matte top coat:
Left to right: with Seche Vite, without top coat, with HC matte top coat
As you can see, it's a bit more matte than a satin/leathery finish, but not quite as matte as some true matte polishes. I will have to do a more extensive review another time. On another note, look at the effect that Seche Vite (or any top coat) has! Besides adding a glossy finish, it really gives depth to the color.
Color Club can be found at some Bed Bath and Beyond locations, as well as several websites. This one was part of a (very cheap!) set I found at Ross, though, so go take a look!
Wednesday, December 1, 2010
T-Day Weekend Haul!
Hope everyone had a good one!
I did head to Wal-mart on Black Fridy, but not until the evening. It wasn't too busy and I didn't really look for any crazy deals (I was probably too late anyway). I just wanted to look at the Hard Candy stuff and I was so giddy! Maybe it's a little juvenile for some, but I love it all! So much glitter. Here's what I walked away with:

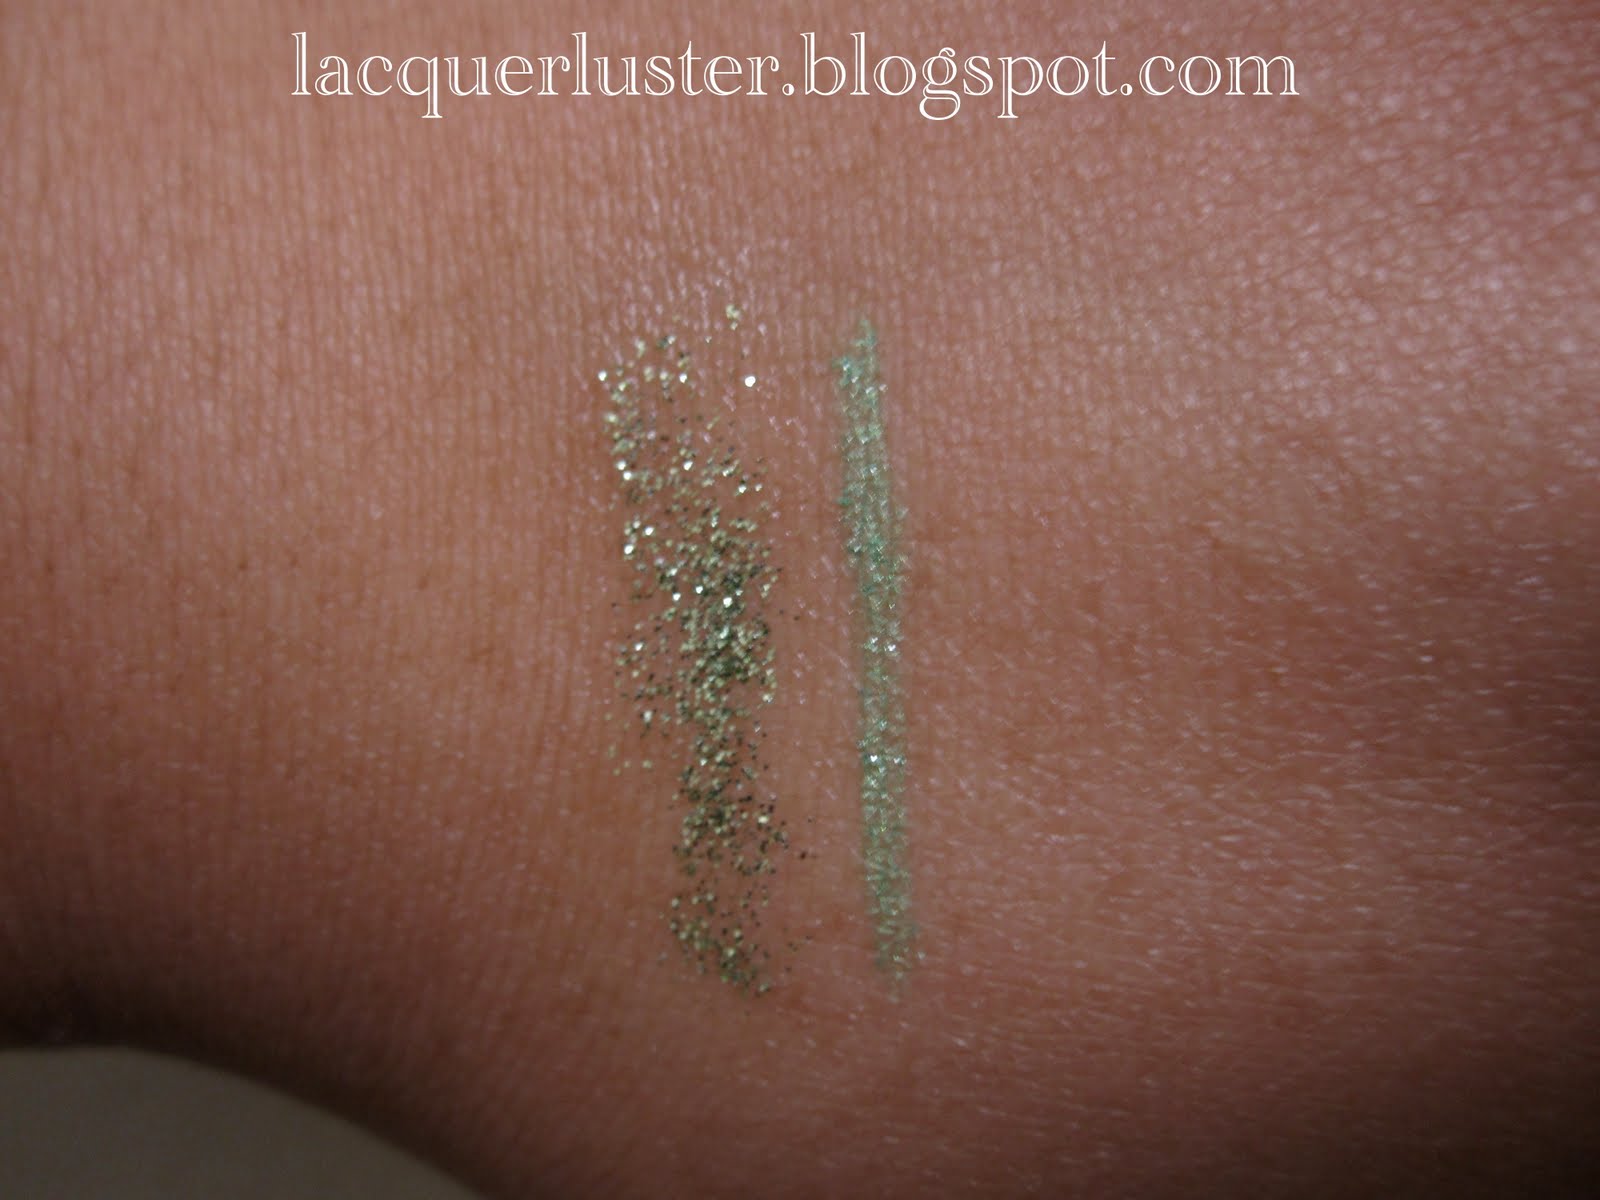
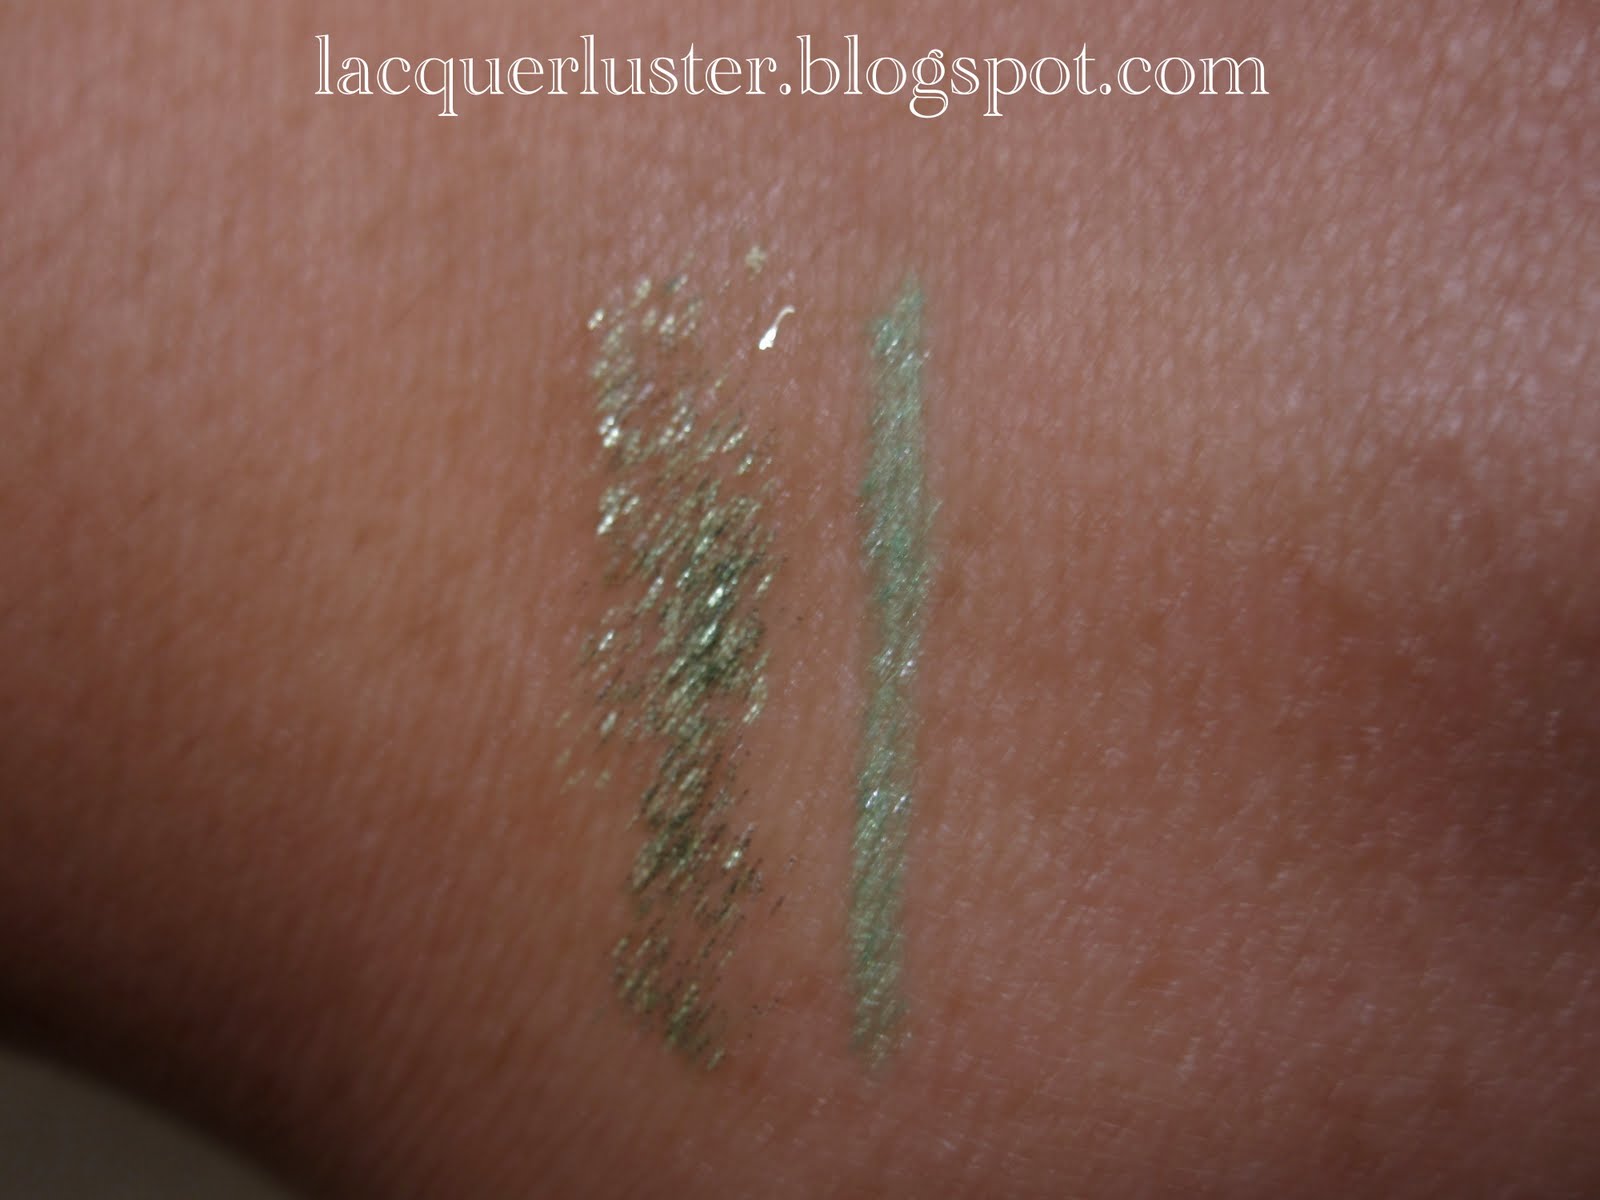
Nail polishes in Envy, Sky, and matte top coat; glitter eyeshadow and eyeliner duo in Ammo. Here are swatches:


The eyeshadow is supposed to be a cream, but it feels more wet, like a gel. It's basically just a lot of green glitter in a clear base. The eyeliner glided on nicely, but I'm skeptical about the staying power of both of these. I guess we'll see.
Sunday, I decided to head to Ross to see if I could find any Color Club sets since I've been hearing that people have been able to find them there. Score!

Electro Candy and Untamed Luxury Covered in Diamonds, $8 each yay! There was another set of glitters, but I resisted because I already own almost all of them, haha. There were also a few incomplete sets.
Oh also, that one bottle in the middle is Orly Shine, which I got for free from Ulta with this coupon:

Click the picture, print it out, and take it to the nearest Ulta to pick from a selection of three colors! Hopefully it's not too late! Shine is a silver foil (bright and shiny, not dark like the picture shows), Oh Cabana Boy is a neon pink, and It's Up To Blue is a pretty teal shimmer.
Very excited to try all the colors!
I did head to Wal-mart on Black Fridy, but not until the evening. It wasn't too busy and I didn't really look for any crazy deals (I was probably too late anyway). I just wanted to look at the Hard Candy stuff and I was so giddy! Maybe it's a little juvenile for some, but I love it all! So much glitter. Here's what I walked away with:
Nail polishes in Envy, Sky, and matte top coat; glitter eyeshadow and eyeliner duo in Ammo. Here are swatches:
The eyeshadow is supposed to be a cream, but it feels more wet, like a gel. It's basically just a lot of green glitter in a clear base. The eyeliner glided on nicely, but I'm skeptical about the staying power of both of these. I guess we'll see.
Sunday, I decided to head to Ross to see if I could find any Color Club sets since I've been hearing that people have been able to find them there. Score!
Electro Candy and Untamed Luxury Covered in Diamonds, $8 each yay! There was another set of glitters, but I resisted because I already own almost all of them, haha. There were also a few incomplete sets.
Oh also, that one bottle in the middle is Orly Shine, which I got for free from Ulta with this coupon:

Click the picture, print it out, and take it to the nearest Ulta to pick from a selection of three colors! Hopefully it's not too late! Shine is a silver foil (bright and shiny, not dark like the picture shows), Oh Cabana Boy is a neon pink, and It's Up To Blue is a pretty teal shimmer.
Very excited to try all the colors!
Subscribe to:
Posts (Atom)